Yes, I know that building a chatbot from scratch used to mean hiring developers, spending weeks in code, and burning through your budget before you even saw results.
But those days are gone.
What this really means is that anyone with a website can now build a smart AI chatbot trained on their own content in just 5 minutes.
No coding knowledge required.
No technical team needed.
Just you, your business data, and a platform that makes the whole process as simple as filling out a form.
I’m going to walk you through exactly how to build a custom ChatGPT chatbot using CustomGPT, one of the most powerful no-code solutions available right now.
By the end of this guide, you’ll have a working AI assistant on your website answering customer questions, generating leads, and handling support tickets while you sleep.
Why Your Business Needs a Custom AI Chatbot
Before we jump into the technical steps, let’s break down what makes custom chatbots different from generic solutions.
The Problem with Generic Chatbots
Standard chatbots give canned responses. They don’t understand your products, your pricing, or your company policies.
When a customer asks something specific about your services, these bots either fail completely or provide useless generic answers.
What Makes Custom ChatGPT Different
A custom chatbot trained on your data actually understands your business. Feed it your website content, product documentation, FAQs, and policy documents.
The AI learns everything about your company and can answer questions with accuracy that matches your best customer service rep.
Here’s what the data tells us that businesses using AI chatbots report a 67% increase in sales conversions and save up to 30% on customer support costs. The return on investment averages 1,275%. That’s not hype, that’s real business impact.
Understanding No-Code Chatbot Technology
Let me explain how this works without the technical jargon.
The Power Behind CustomGPT
CustomGPT uses GPT technology, which is the same AI that powers ChatGPT. But instead of drawing from general internet knowledge, your custom bot only uses information you provide.
This means zero hallucinations, no made-up facts, just accurate answers based on your actual content.
Data Integration Methods
The platform accepts information in multiple formats:
| Data Source | Best For | Typical Use Case |
|---|---|---|
| Website Sitemap | Public information | Product details, blog content, service pages |
| PDF Documents | Internal knowledge | Employee handbooks, technical specifications |
| Word Documents | Policies and procedures | Terms of service, return policies |
| Text Files | Quick updates | FAQs, announcements |
| Audio/Video Files | Training materials | Tutorial videos, webinars |
| Google Drive Integration | Existing documents | Company wikis, shared drives |
The system supports over 1,400 file formats and can even process YouTube videos, making it incredibly flexible for different business needs.
Step 1: Create Your Account
Getting started requires one important thing that is a business email address.
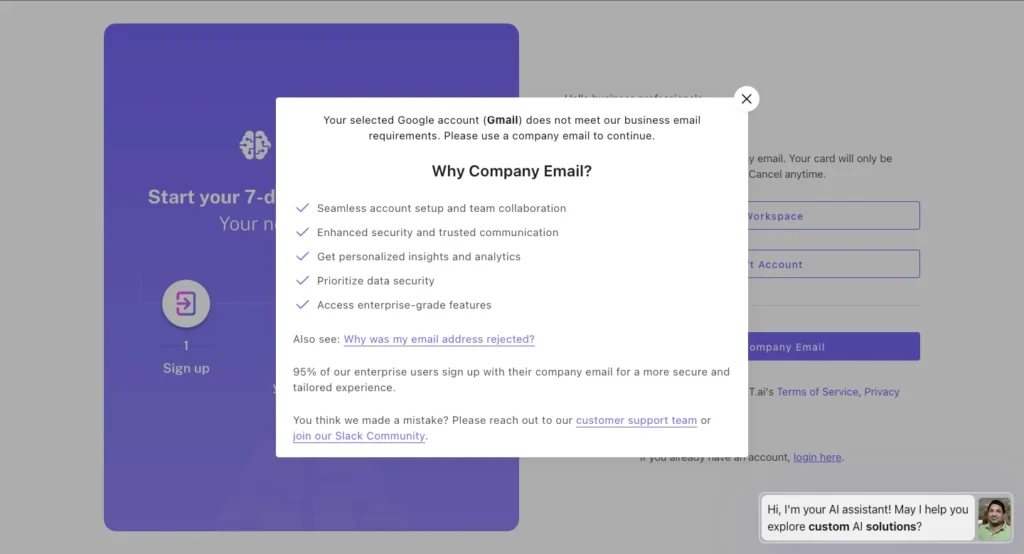
Yes, the CustomGPT requires a company or business email for registration. You cannot sign up using personal Gmail, Yahoo, or Outlook accounts.
This is a deliberate business decision to ensure the platform serves legitimate companies rather than casual users.
What Qualifies as a Business Email?
You need an email address tied to your own domain. Examples:
If you’re a freelancer or solopreneur without a custom domain, you’ll need to set one up first.
Services like Google Workspace, Microsoft 365, or Zoho Mail let you create professional email addresses using your domain for minimal monthly fees.
The Sign-Up Process
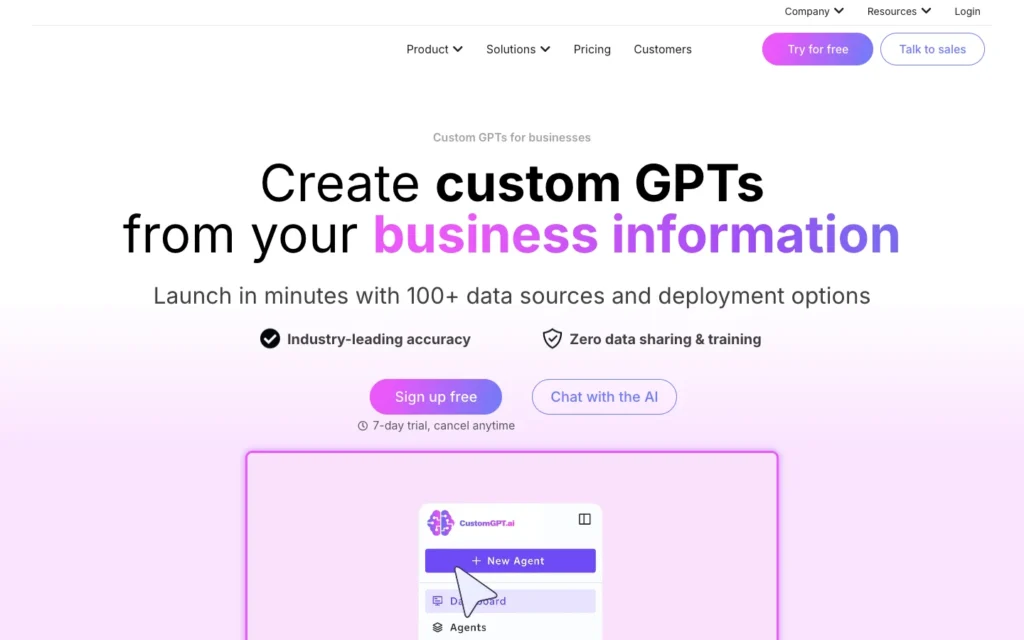
Once you have your business email ready:
- Visit the CustomGPT website and click “Sign Up Free“
- Enter your business email address
- Create a secure password
- Verify your email through the confirmation link sent to your inbox
- Complete your business profile with company details
The entire process takes under two minutes once you have the right email credentials.
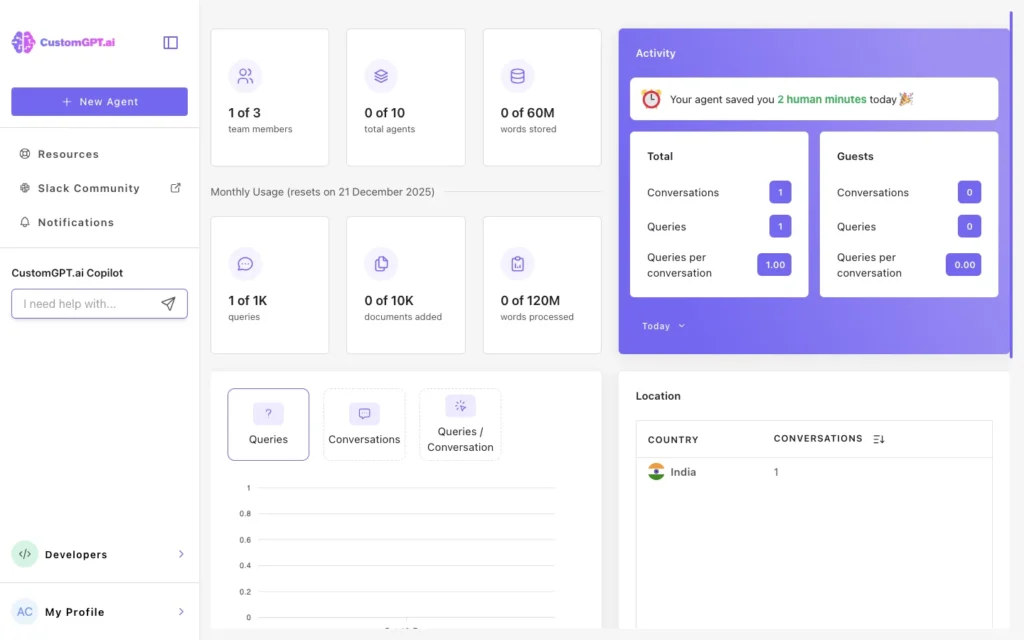
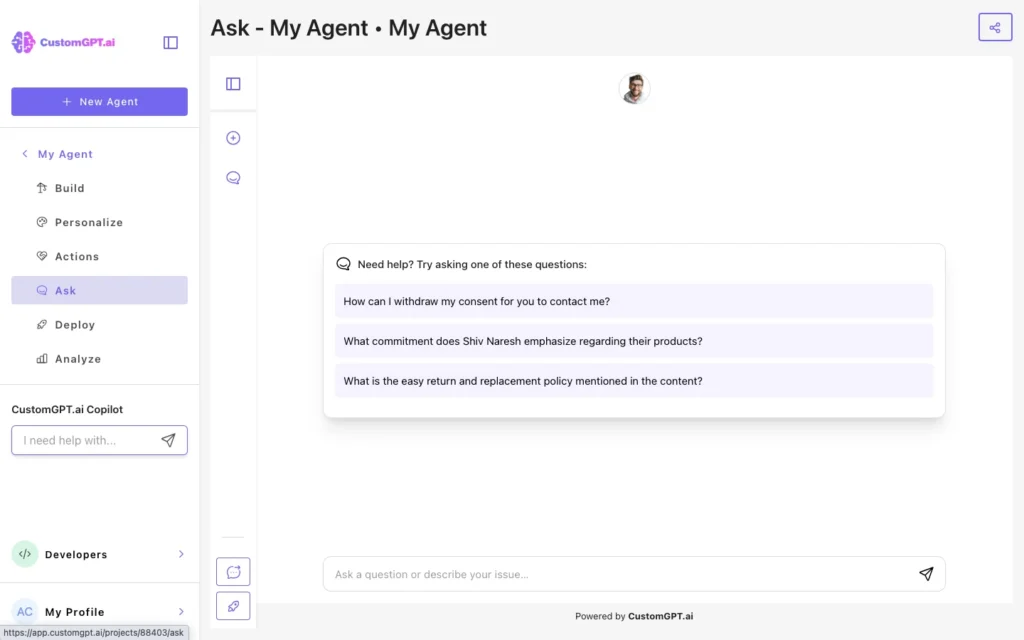
You’ll land directly on the dashboard where you can start building your first chatbot project immediately. Click ‘New Agent’.
Step 2: Ingest Your Data
This is where the magic happens.
You’re teaching the AI everything it needs to know about your business.
Option A: Using the Sitemap Feature (Recommended for Websites)
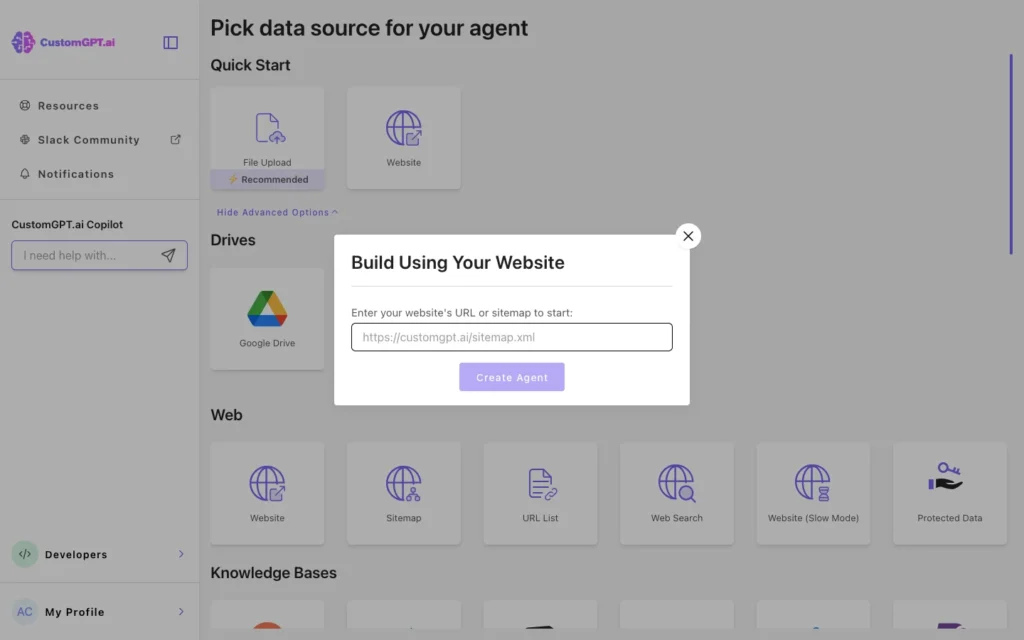
If your business has a website, this is the fastest method.
- Navigate to the “New Agent” section in your dashboard
- Select “Website”
- Enter your website’s sitemap URL
- The platform automatically discovers your sitemap and crawls all public pages
- Within minutes, your chatbot has absorbed your entire website content
The system processes your pages, extracts the text, and organizes everything into a searchable knowledge base.
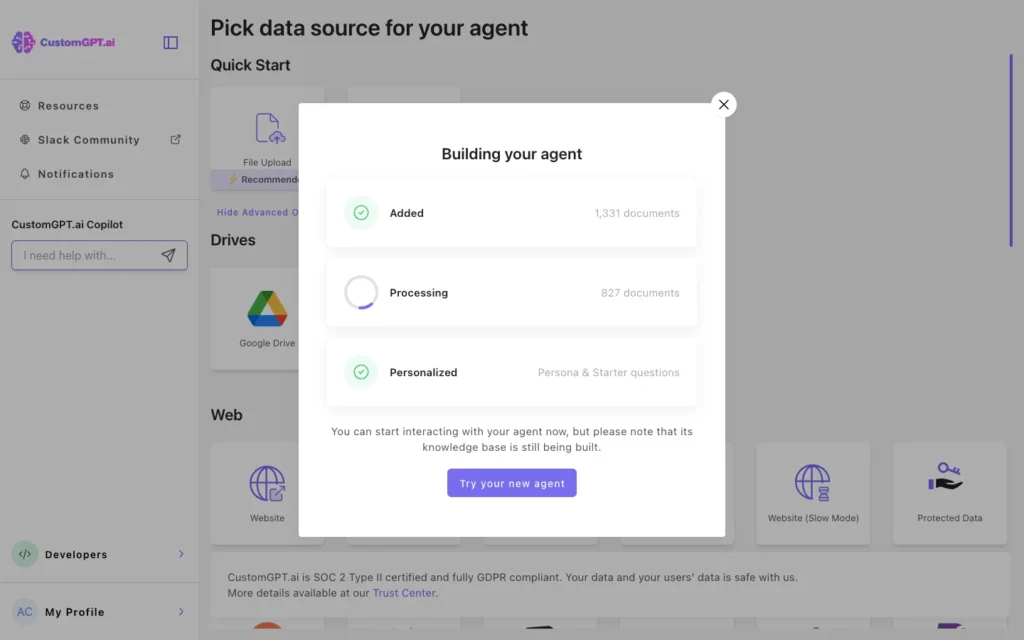
You don’t need to do anything except wait for the green checkmark confirming the import is complete.
Option B: Uploading PDFs and Documents (Recommended for Internal Knowledge)
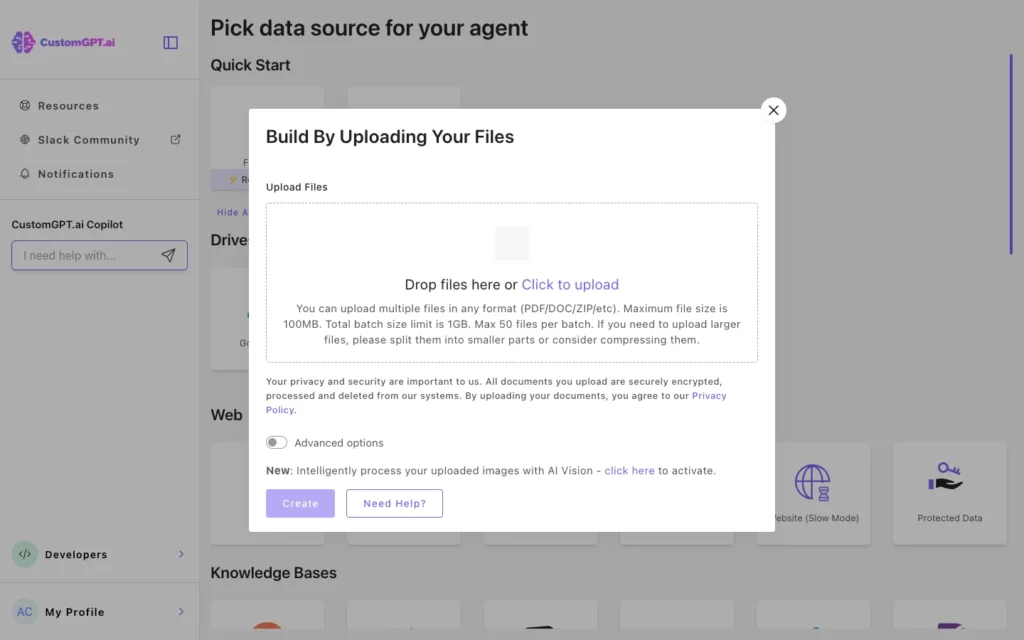
For information not on your website, use the document upload feature.
- Click “Add Files” in your bot settings
- Select multiple PDFs, Word docs, or text files from your computer
- The platform processes each file, extracting text and maintaining context
- You can upload files in batches or add them individually
This method works perfectly for:
- Employee training manuals
- Product specifications not yet on your website
- Internal policies and procedures
- Customer success case studies
- Detailed technical documentation
Step 3: Customize the Persona
Your chatbot’s personality matters more than you think. A friendly, helpful assistant converts better than a robotic response machine.
Defining Your Bot’s Character
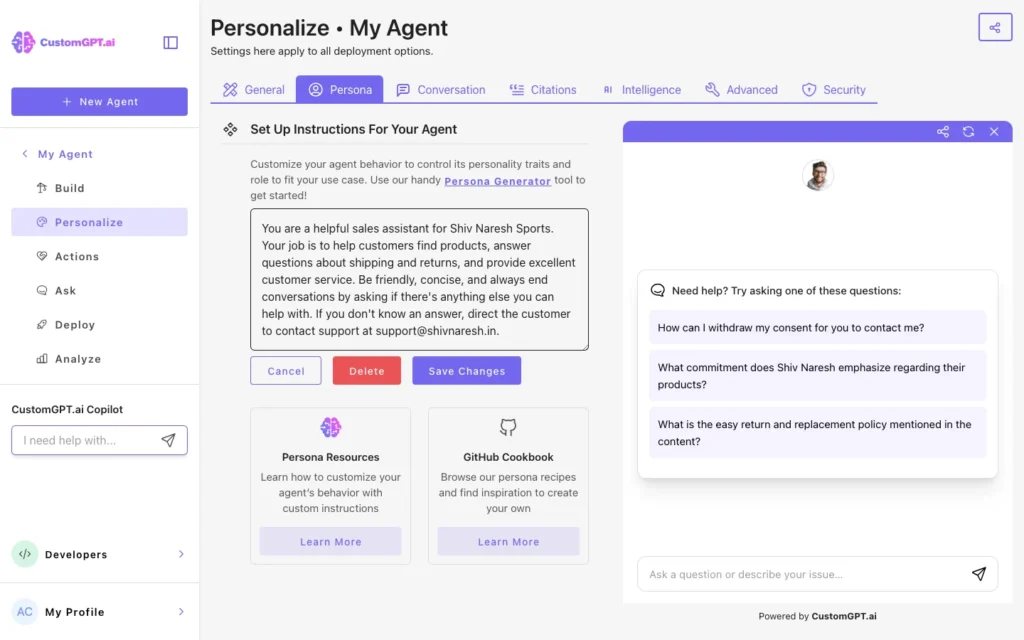
In the Personalize settings, you’ll find a “Persona” field. This is where you tell the bot how to behave.
Example instruction for an e-commerce store:
You are a helpful sales assistant for [Your Store Name]. Your job is to help customers find products, answer questions about shipping and returns, and provide excellent customer service. Be friendly, concise, and always end conversations by asking if there's anything else you can help with. If you don't know an answer, direct the customer to contact support at [email].
Tone and Style Guidelines
Match your brand voice. If you’re a law firm, your bot should sound professional and authoritative. If you’re a skateboard shop, inject some personality and casual language.
Key elements to define:
- Formality level (casual vs. professional)
- Response length (brief vs. detailed)
- Personality traits (enthusiastic, calm, humorous)
- Fallback behavior when the bot doesn’t know something
Setting Response Boundaries
Tell your bot what NOT to do. For instance:
“Never discuss pricing unless you find it in the knowledge base. Never make up product availability. Never promise discounts without authorization.”
This prevents the AI from making commitments your business can’t keep.
Step 4: Embed on Your Site
Getting your chatbot live on your website is surprisingly simple, regardless of which platform you use.
For WordPress Users
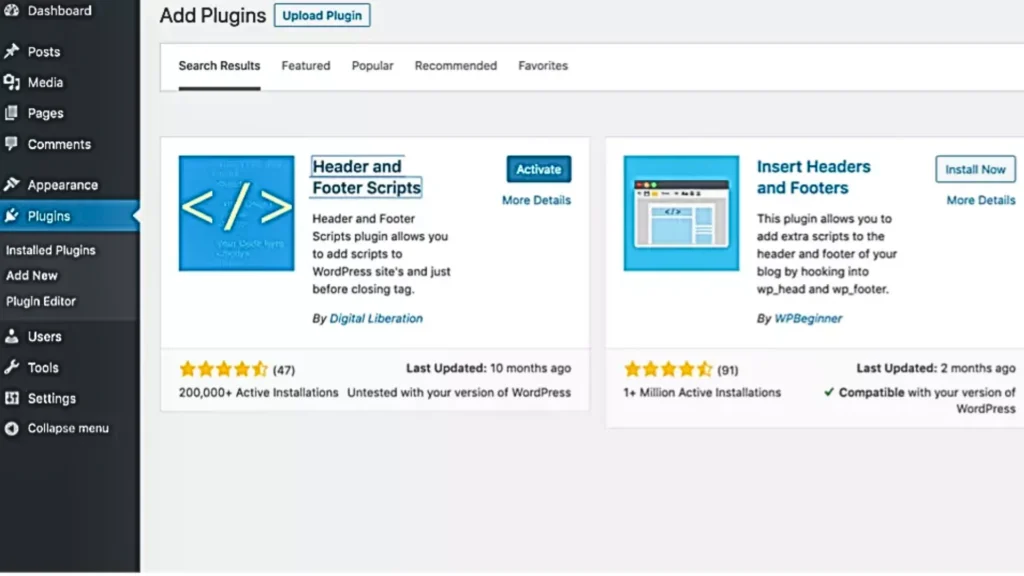
WordPress makes integration painless with plugin support:
- Install the “Header and Footer Scripts” plugin from the WordPress directory
- In your CustomGPT dashboard, click “Deploy” and copy the embed code
- Navigate to Settings → Header and Footer Scripts in WordPress
- Paste the code in the “Footer Scripts” section
- Save changes
Your chatbot appears as a small bubble in the bottom right corner of every page. Visitors can click it to start a conversation.
For Shopify Stores
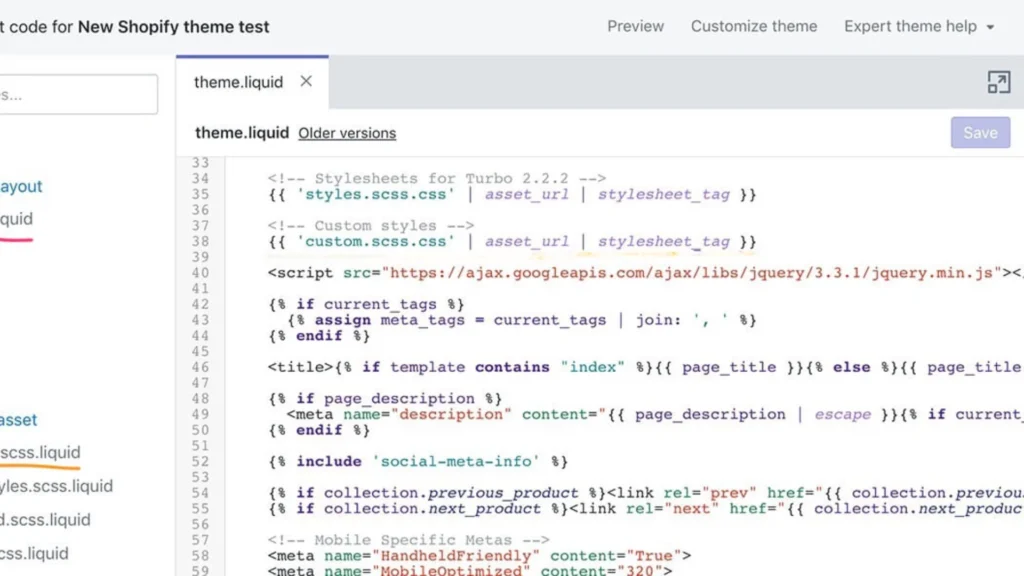
Shopify embedding requires accessing your theme code:
- From your CustomGPT dashboard, copy the chatbot embed code
- Log into Shopify Admin
- Go to Online Store → Themes
- Click “Actions” → “Edit Code” on your active theme
- Find the
theme.liquidfile in the Layout folder - Scroll to the bottom and paste the embed code just before the closing